my name is ali turetzky. i am from the san francisco bay area and love both ballet and baking. i have been training at the san francisco ballet school for the past 4 years. i am excited to share my passion for food (especially sweets) with you all.

-thanks for reading
-xoxo, ali

Tuesday, December 17, 2013

six.

So this past weekend, one of my good friends had a holiday-cookie-share party. I am constantly making food for my friends (partially so I won't eat everything myself) The hardest part about baking for me is figuring out what I want to bake. The options are endless…cookbooks line my shelves and delicious looking Pins taunt me every time I open my laptop and fire up Pinterest. Do I want to make cookies? Cupcakes? Brownies? After browsing my "Yummy" Pinterest board for quite some time, I settled on a fancy looking lemon cake encased in a toasted meringue. It sure looked fitting for a party.


I wouldn't suggest making these tasty treats if you are in a rush as they are quite time consuming. But if you have a couple of hours on your hands, these are a lovely treat for any occasion.  Just set aside some time to relax and bake these cute little cakes.

 The first step in this recipe is to make the cakes. It starts off like any other cake..butter, sugar, eggs.


Once you have those ingredients ready, it's time to start working with the lemon. I am lucky to have a lemon tree in my yard that basically produces dozens of perfectly ripe lemons year round. I zested a whole lemon and then squeezed it's sour yet somehow invitingly-sweet juice. 

I then added the zest to the butter and sugar and creamed it all into a sweet smelling concoction. Once it was combined, I added the flour, baking powder, milk, and lemon juice. All looked (and tasted) good! Into the oven they went! The recipe said to use standard cupcake pans, but it would only yield six. I decided to make mini cupcakes instead so that I would have enough to share with my friends. 


After these guys were fully baked and cooled, I used a pearing knife to carefully (emphasis on carefully) cut little holes out of the tops of the cupcakes to make room for a tiny dollop of vanilla ice cream. YUM! This step is fairly tedious and I am not exactly sure if the ice cream in necessary… I feel like the cakes would turn out just fine without it. Anyways, as it was my first time making the recipe, I followed each step. 


 I melted the ice cream for 20 seconds in the microwave so it would be easier to spoon out into the cupcakes. This step doesn't have to be neat or precise, you won't see it once you spread on the merengue.

After filling the cupcakes, I popped them in the freezer for 30 minutes while I started working on the meringue. While meringue can be slightly daunting, I actually find making it to be very fun! Basically you just whip everything up and voila! Heaven!


Once I had the meringue ready, I took the hardened cupcakes out of the freezer and "frosted" (more like smeared) the merengue all over the tiny things. You don't have to make it look perfect, peaks and bumps actually make the final product look better than if the it was completely smooth. 

 The final step is to toast the cakes. I used the low setting on my oven broiler and I caution you all, don't leave the kitchen while these are in your oven! They toast up in about a minute so I would stand by the oven waiting to see that lovely golden color creep up the tiny cakes.

After letting them cool, serve immediately. I took these to the cookie swap and they were a huge hit! The simple lemon cake was delicious and the merengue added the perfect touch to this pretty dessert.


-Ali


{meringue-encased lemon cakes:}

125g butter, softened
1 cup (220g) caster (superfine) sugar
1/4 cup finely grated lemon rind
2 eggs
1 1/2 cups (225g) plain (all-purpose) flour, sifted
1 1/2 teaspoons baking powder, sifted
1/2 cup (80ml) milk
2 tablespoons lemon juice
6 scoops vanilla ice-cream
basic meringue mixture {see below}

preheat the oven to 160°c (320°f); place the butter, sugar and lemon rind in the bowl of an electric mixer and beat until light and creamy; gradually add the eggs and beat well; fold in the flour, baking powder, milk and lemon juice; spoon the mixture into 6 x 1 cup-capacity (250ml) lightly greased muffin tins and bake for 30 minutes or until cooked when tested with a skewer; cool in tins for 5 minutes; remove and cool on a wire rack

using a tablespoon, scoop out a hole in the top of each cake and fill with a scoop of ice-cream; place the cakes on a tray and freeze for 30 minutes; spread the basic meringue mixture over the cakes and place on a baking tray; cook under a preheated hot grill (broiler) or in a preheated 200°c (390°f) oven for 2-3 minutes or until the meringue is set and golden; serve immediately; makes 6


......................................................................................................

{basic meringue mixture}


150ml eggwhites (approximately 4 eggs)
1 cup (220g) caster (superfine) sugar
1 teaspoon white vinegar

place the eggwhites in the bowl of an electric mixer and beat until stiff peaks form; gradually add the sugar and vinegar and beat until the mixture is thick and glossy; use immediately




Tuesday, December 10, 2013

cinq.

The holidays are officially among us. Christmas tree lots are filled with families searching for the perfect tree. Shopping malls are packed with people frantically making holiday purchases. It is the season of peppermint mochas in red christmas cups, snowflakes (paper ones at the very least), and of course, holiday parties! And do you know what goes along with holiday parties? If you thought of decadent sweets and fancy treats you would be absolutely correct!

This past weekend, my parents were going to a neighbor's christmas party and asked me to make a dessert for them to bring. I said yes, of course.. the only issue was figuring out what to make. I had so many ideas (my multiple dessert Pinterest boards are to blame). After clicking and flipping and searching, I decided on a toasted coconut shortbread cookie with a dark chocolate drizzle.
 Coconut is hands down one of my favorite things, aside from chocolate of course. And combining the two? Pure bliss. I really couldn't imagine anything better. I saw the recipe and immediately made a shopping list and drove to the store and got to work. The dough is a basic shortbread recipe. The only difference is the addition of toasted coconut. I bought sweetened coconut, and toasted it on a cookie sheet in the oven until golden. I then tossed the toasted shreds of heaven (aka the coconut if you didn't catch on) into a food processor in order to get a really nice consistency to add to the shortbread dough.
After a few too many lick-the- beater moments, I reluctantly wrapped the dough in plastic wrap and popped it into the fridge to chill. To me, this is the only downside to baking. I am so impatient with food and have such a hard time waiting hours and hours for things to chill, set, and bake. After what seemed like decades (really only and hour) I took the dough out from the fridge and let it warm up for a few minutes. 

 Once it became soft enough to roll, I floured my counter top and got to rolling and cutting. I used a christmas tree cookie cutter to be festive, but any cookie cutter would be perfect for a recipe like this. After cutting out plenty of adorable christmas trees, I stuck them into the oven for about twenty minutes to bake! 

As the cookies were baking, I started melting the chocolate for the drizzle topping. This step isn't required, the cookies certainly taste fantastic on their own. I just thought the dark chocolate would work well and add a little bit of chocolaty goodness to the cookies. You could also dip the cookies in white chocolate or even frost them with a frosting you like. 

I melted the chocolate using a double boiler, basically just a pan with water and a bowl on top.


Once the cookies came out of the oven (looking great and smelling even better might i add), I used a spoon to drizzle the melted chocolate on top!

I am officially hooked on these cookies. I think I will be making a few more batches to send to people. Shortbread are great for shipping because they are fairly hard and won't smooth together while en route! 

Here is the amazing recipe courtesy of Smitten Kitchen :

Toasted Coconut Shortbread
Adapted from Bon Appetit, April 2004
The original recipe was double this size, yielding six dozen cookies. I halved it.
1/2 cup (about 1.5 ounces) unsweetened shredded coconut*
3/4 cup (1 1/2 sticks or 6 ounces) unsalted butter, room temperature**
1/2 cup plus 1 teaspoon sugar
1/2 to 3/4 teaspoon coarse kosher salt (Updated: for unsweetened coconut, the smaller amount; sweetened, the larger amount)
1/2 teaspoon vanilla extract
1 1/3 cups all purpose flour
Preheat oven to 325°F. Spread coconut on rimmed baking sheet. Bake until coconut is light golden, stirring occasionally, about 8 minutes. Cool completely, then grind in a coffee grinder, food processor or blender until coarsely ground.
Using electric mixer, beat butter and sugar in large bowl until well blended. Mix in salt and vanilla. Beat in flour in 2 additions. Stir in toasted coconut. Gather dough together, flatten into a disc and wrap in plastic. Chill at least 1 hour. (Can be prepared 2 days ahead. Keep chilled. Soften slightly at room temperature before rolling out.)
Preheat oven to 325°F. Line a rimmed baking sheet with parchment paper. Roll out dough disk on lightly floured work surface to scant 1/4-inch thickness. Using 1 3/4- to 2-inch-diameter cookie cutters, cut dough into rounds. Transfer cookies to prepared baking sheets, spacing 1 inch apart. Gather dough scraps and reroll; cut out additional cookies.
Bake cookies until light golden, about 20 minutes. Cool on baking sheets 10 minutes. Transfer cookies to racks and cool completely. (Can be made ahead. Store airtight at room temperature up to 1 week.)
* I couldn’t find unsweetened, so I used sweetened and dialed back the sugar by 2 tablespoons.
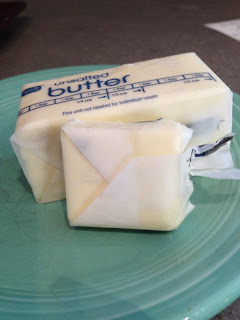
** If you’re looking for an excuse to splurge on the good butter, shortbread is it. You will absolutely appreciate the extra flavor as it shows up in this cookie.


Tuesday, December 3, 2013

quatre.

Key. Lime. Pie. Three letters but oh so delicious. Every year for the holidays, my job is to make the pies/desserts. This year, I was looking through cookbooks and bookmarking ideas when my dad asked me if I could make a key lime pie for our Thanksgiving. Never having made this specific pie before, I was intrigued. I said yes, of course and got to researching. I found a promising recipe in one of my favorite cookbooks, The Craft of Baking. Then it was go time!

My family was spending Thanksgiving at the beach. We were meeting relatives and staying in a little beach house. Because I didn't want to lug around a ton of baking ingredients, I decided to make part of the pie at my house, and part of it at the beach house. I would say that the plan worked pretty well because the pie turned out fabulous.

The first thing I went about doing was making the curd filling. Before making this pie, I had no clue what key limes. I thought they were just like normal limes, but with a special name! I was shocked when my little sister brought home a bag of tiny little green things. They were so cute!
For the curd, I had to squeeze juice from about ten of the key limes. This proved to be harder than it looked because the limes were so tiny and firm. After a bit of work though, it worked just fine. After combining the ingredients for the curd; lemon juice, lime juice, sugar, zest, and some eggs if I recall correctly, the next step was to heat it over a double boiler. 


This step of the recipe is fairly time consuming because you have to continuously whisk the liquid for twenty minutes until it becomes the right consistency..that of curd. I have to say that I am guilty of the "finger in the bowl" taste test with this recipe. The curd passed the test with no problem. It was tangy and sweet with a powerful citrus flavor. I didn't think it could get much better. But in fact, I was wrong about that. After chilling the curd, I whipped up heavy cream until it was stiff and folded it in to the curd mixture. The result was a creamy-rich-citrusy-sweet burst of yumminess. 
I brought the curd with me in a glass container as my family and I drove down to the beach. Once we arrived (after walking down to the beach, of course) I went about making the pie crust. The recipe was pretty straight forward as far as pie crusts goes. Flour, salt, butter, shortening… 

 My grandma taught me to incorporate the cold butter into the mixture with two knifes, facing opposite directions so that they are able to cut the butter into finer and finer pieces. I find this very tedious, but it works! Once you get the grainy, flaky (somewhat dry even) texture

Friday, November 22, 2013

trois.

joyeux anniversaire. happy birthday. Yesterday was my eighteenth birthday, I am officially old now! Any special occasion calls for a wonderful cake, but none more so than a birthday. Since I am usually the one to bake in the family, I decided that there was no shame in making my own cake. Actually, it was quite nice. I picked out exactly what I wanted, my little present to myself.

I decided on a frangipane raspberry cake from a cookbook my sister gave to me, "tea with bea". The cake itself is a moist vanilla/almond cake that uses almond paste. Almond paste, similar to marzipan is one of my favorite things! I was immediately drawn to this recipe when I saw that ingredient. The cake is layered between raspberry jam and topped with scrumpcious vanilla flavored Italian Buttercream.

The cake as a whole takes a bit of time ( I made mine the night before), but isn't extremely difficult. The almond cake is straightforward; mix bake, yum. The buttercream is the tricky part. Temperature is absolutely key in any kind of buttercream. You make a meringue which you then add to the butter, but if it isn't properly cooled, the entire mixture will melt..not ideal. If you take your time and really watch the temperature (using a candy thermometer) it should turn out parfait!


 Shown below is the Italian buttercream being mixed up. YUM!


 Up above, I show the steps of frosting the cake. I refrigerated the cake after the first later so it would have time to set. Then, I was able to do the fun and pretty decorating.


My cake even had it's own shelf in the fridge! 


I had a wonderful birthday spent with friends and family. The perfect way to end the day? Cake, of course! I was hoping that this cake would be as good as I had anticipated. And I have to say, it was! The almond cake was moist and dense. The tart jam and light buttercream tied everything together for pretty darn good birthday cake. I would say this baking adventure was a success! 

-ali

Tuesday, November 12, 2013

Deux.

It is quite difficile for me to think of anything that beats the crunch and taste of an Oreo straight from the blue re-sealable package. As much as I love my gourmet, lavender infused macaroons and freshly baked scones, an Oreo always hits the spot for me. So why you might ask, have I never dared to make homemade Oreos? I am now asking myself the same question. If I would have known how incredible these little things would be, I would have tried these years ago.

The recipe is a two-parter..the heavenly, chocolaty dough being part 1 and the famous "Oreo Cream" as part 2. Both steps are straight forward and not too time consuming.

Once the dough is made, it get's rolled up in "press and seal" and refrigerated for a few hours. After that, cut, bake, and voila! 
The frosting is super easy to whip up and you just dollop it on one cookie and sandwich another on top. Easy Peasy. The cookies are crisp and rich, the perfect balance. They were a big hit with my friends and family. I will definitely be making these again! 

mmmm mmm mmm
Here is the recipe for these delicious treats! Enjoy! 
Ingredients:
1 cup (2 sticks) unsalted butter, melted and cooled slightly
3/4 cup granulated sugar
1 teaspoon vanilla extract
1 cup semisweet chocolate chips, melted and cooled slightly
1 egg
1 1/2 cups all-purpose flour
3/4 cup Dutch-processed cocoa powder
1 teaspoon kosher salt
1/2 teaspoon baking soda

vanilla cream filling-
1/2 cup (1 stick) unsalted butter, softened
1 2/3 cup confectioners' sugar
1 teaspoon vanilla extract
1 tablespoon milk
pinch of salt

Directions:
  1. In a medium bowl, whisk together the butter and sugar until well combined.  Whisk in vanilla and chocolate chips.  Add the egg and whisk until thoroughly incorporated.
  2. In another medium bowl, stir together the flour, cocoa powder, salt, and baking soda until well mixed.  Using a wooden spoon, stir the flour mixture into the chocolate mixture.  The dough will have the consistency of Play-Doh.  Let the dough sit at room temperature for about 1 hour to firm up.
  3. Transfer the dough in a 15-inch square sheet of parchment or waxed paper.  Using your hands, shape the dough into a rough log about 10 inches long and 2 1/2 inches in diameter.  Place the log at the edge of the sheet of parchment paper, and roll the parchment around the log.  With the log fully encased in parchment, roll it into a smoother log, keeping it at 2 1/2 inches in diameter.  Refrigerate for at least 2 hours, or until firm.  The log may settle and sink a bit in the fridge, so reroll it every 30 minutes or so.  (At this point the dough can be well wrapped in plastic wrap and stored in the refrigerator for up to 1 week or in the freezer for up to 1 month.)
  4. Preheat the oven to 325° and butter or line a baking sheet with parchment paper.  
  5. Cut the dough log into 1/4 inch thick slices.  Place the slices 1 inch apart on the prepared baking sheet.
  6. Bake for 20-25 minutes, or until the cookies are firm to the touch.  Check them frequently after 16-17 minutes by poking them in the middle.  Let cool on the baking sheet until barely warm or right at room temperature. 
  7. While the cookies are cooling, make the filling by beating the butter on low speed for 30 seconds in the bowl of a stand mixer (or with a hand mixer) fitted with the paddle attachment.  Add the vanilla and confectioners' sugar and beat until smooth.  Add milk and salt and again beat until smooth.
  8. Scoop about 1 tablespoon of the filling onto the bottom of one cookie.  Top with a second cookie, bottom-side down, then press the cookies together to spread the filling toward the edges.  Repeat until all of the cookies are filled.

Au Revoir,
-Ali 
09 10 11 12
Blogging tips